I’m so excited to introduce another guest blogger to you. I only met Fawn a couple of years ago, but we quickly realized we share a love for writing, blogging, a good laugh, and a heartfelt, 3-hour conversation over breakfast. Her desire to give back and help others is inspiring, and her organizational and tech-savvy skills know no bounds. Today’s post is evidence of that as she shares a simple and easy idea for solving an age-old problem: How to Tame the Polar Gear Vortex!
**************************************************
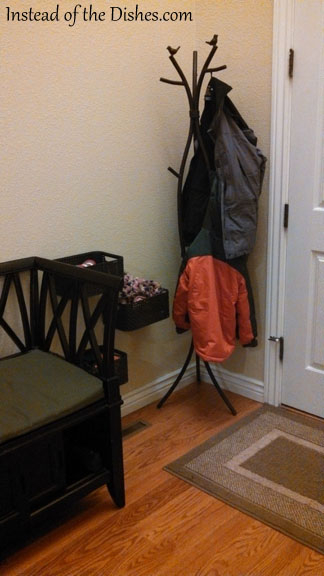
Last winter was an especially brutal one, and both the weather forecasters and the persimmon seeds are predicting much of the same this winter. If you’re like me, you’re probably not looking forward to the cold temps OR the process of bundling and unbundling the entire family every time you leave the house.
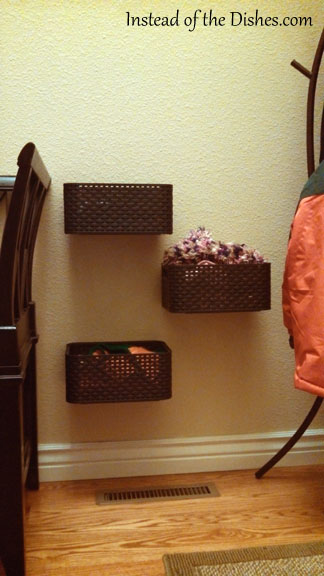
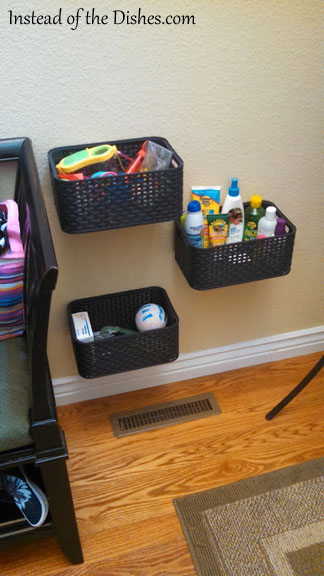
Last year I got so tired of piles of wet things at my front door and searching for that one missing mitten, so I decided to do something about it. We don’t have a lot of storage space in our entry way, so I wanted to add something that would help corall hats, mittens, and scarves and free up more floor space for boots. The floating basket idea was born.
Supplies for the project:
- Plastic or other sturdy basket/container (I used three – one for each child and one for my husband and I to share)
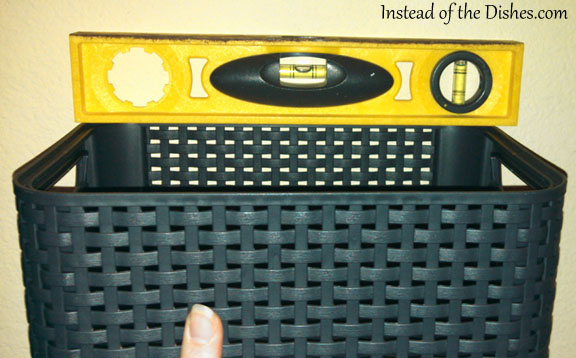
- Level
- Tape Measure
- Hammer
- Drill or screwdriver
- Pencil
- Finishing Nails
- Wall Screws
I found my baskets in the bathroom section at Target. They are Curver Style brand in size small. I chose them because they are made from recyclable plastic, so they would be waterproof and easy to wipe down. They also have an open weave design that makes it easy to hang them on the wall, and they don’t look like a plastic bin (IMO).
Steps:
- Determine approximate location where you want to hang your first bin. Hold it up to the wall and make sure it is level.
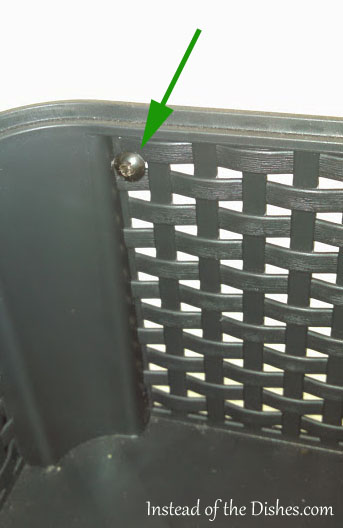
- Mark where your nails/screws to hold the basket up will go with a pencil. Depending on the style of your basket, you may have to drill holes through the basket for hanging first.
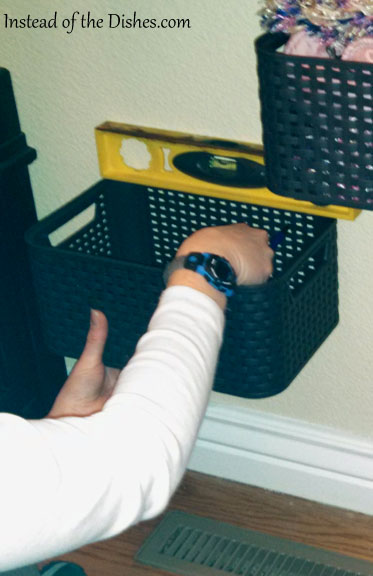
- Take the basket off the wall and hammer the finishing nails into the pencil marks. Then, remove the nails, hold the basket back up to the wall, and push the nails back in so the basket is hanging on the wall. The finishing nails let you make adjustments if needed without making big holes in the wall.

- Repeat Steps 1 through 3 for all of your containers. I used a measuring tape to measure out the spacing so it would be even.

- Once you have the bins hanging where you want them, screw them into place with wall screws. Try to get a screw that matches the color of your basket, or you can paint the screw head.
- Fill those bins with the cozy gear everyone needs to keep warm!
In the summer time, our floating baskets transition to hold summer gear – one for small outdoor toys, one for sunscreens and bug sprays, and one for first aid and sunglasses.
Total cost was less than $35, and the kids no longer have excuses for missing gloves and hats!
 Fawn Rechkemmer writes about motherhood, being green, health and fitness, travel, and more on her blog, Instead of the Dishes. She lives in Southwest Missouri with her husband and two children, where she is a freelance writer, editor, and PR consultant.
That’s a great solution to the winter gear problem! We do have a small coat closet right next to our front door (and no wall space like you have) so I think I’m going to try to do something similar inside the closet.
This is such a great idea! I’m going to hang a set of these above our shoe rack by the door. We don’t have a mud room, so between the decorated shoe rack and these baskets we’ll have a make shift one! Thanks for the great idea!